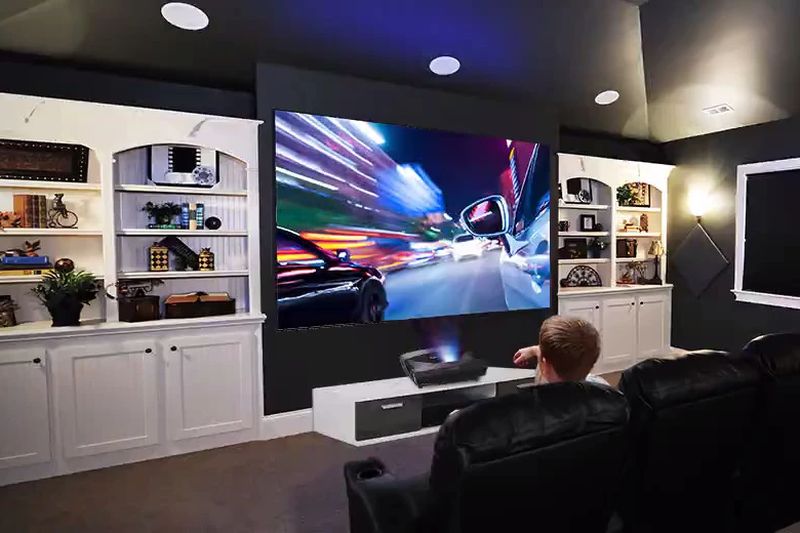
Projectors are a fantastic way to bring the cinematic experience right into your home. To fully enjoy the immersive visuals, it’s crucial to properly adjust the image size and focus on your projector. In this guide, we will walk you through the steps to achieve optimal image quality and make the most out of your viewing experience.
Before we dive into the adjustment process, let’s briefly discuss why image size and focus are important. The image size determines the dimensions of the projected picture, while focus ensures that the image appears sharp and clear. Adjusting these two aspects correctly will enhance the visual impact and prevent any distortion or blurriness.
Step 1: Positioning and Distance
Start by determining the ideal location for your projector. Consider factors such as room size, screen or wall placement, and audience seating. Once you have selected the spot, calculate the distance between the projector and the screen. Consult the projector’s user manual or specifications to find the recommended throw distance for your model.
Step 2: Image Size Adjustment
To adjust the image size, most projectors offer a zoom function or lens adjustment. Check if your projector has a zoom lens and adjust it to increase or decrease the image size. Alternatively, you can move the projector closer or farther from the screen to achieve the desired image size. Take into account the aspect ratio of your content and ensure that the projected image matches it appropriately.
Step 3: Focus Adjustment
Now that you have set the image size, it’s time to focus it. Begin by accessing the focus controls on your projector. This is usually done through a focus ring located around the lens or via an on-screen menu. Start with a slightly defocused image and then slowly rotate the focus ring until the picture appears sharp and well-defined. Pay attention to fine details, such as text or small objects, to ensure they are clear and crisp.
Step 4: Test and Fine-Tune
After adjusting the image size and focus, it’s crucial to test and fine-tune the settings. Display different types of content, including movies, photos, and text, to ensure optimal clarity and sharpness across various media. If needed, make slight adjustments to the image size and focus until you achieve the desired results.
Step 5: Calibration and Advanced Settings
For enthusiasts who want to take their projector setup to the next level, consider calibrating the projector using advanced settings. This involves adjusting parameters like brightness, contrast, color temperature, and gamma levels to achieve accurate and vibrant colors. Refer to the projector’s manual or consult professional calibration guides to explore these advanced settings further.
By following these steps, you can successfully adjust the image size and focus on your projector, resulting in an immersive and visually satisfying experience. Remember to experiment and fine-tune the settings according to your personal preferences and the specific characteristics of your projector.
In conclusion, mastering the art of adjusting image size and focus on a projector is essential for optimizing your home theater setup. By carefully positioning the projector, adjusting the image size, and fine-tuning the focus, you can create a captivating viewing environment. Enjoy your favorite movies, sports events, and multimedia content with stunning clarity and immersive visuals.